What are Ombre Nails | How to Create Ombre Nails? Learn about ombre nails, an emerging trend in nail art that involves gradient shading from light to dark. In this article, you will learn how to create ombre nails at home, as well as variations such as glitter ombre and reverse ombre.
Explore unique ombre nail designs and learn how to maintain and remove ombre nail polish.”
Table of Contents
Introduction:
The use of ombre nails, also known as gradient nails, has become increasingly popular among nail art enthusiasts in recent years. The ombre effect is characterized by a gradual transition from light to dark shades, resulting in a beautiful and eye-catching result.
This article discusses the basics of ombre nails, including how to create them at home and variations on the classic style.
What are Ombre nails?
The ombre nail polish technique involves fading the color of the nail polish from one shade to another, usually from a darker shade at the bottom to a lighter shade at the top.
‘Ombre’ is a French word that means “shaded” or “gradient,” so this type of manicure is commonly referred to as “ombre nail polish” or “gradient nail polish.”
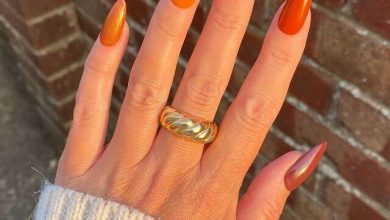
Due to their versatility in colors and techniques, ombre nails are a popular choice for nail art, and they can be customized to suit the individual’s preferences and style.
How to create ombre nails?
In recent years, ombre nails, also known as gradient nails, have become increasingly popular among nail art enthusiasts.
An ombre nail is characterized by a gradual transition between light and dark shades, creating a striking and eye-catching appearance.
You will need a few supplies and a little patience if you wish to create ombre nails. The following is a step-by-step guide on how to create ombre nails at home:
-
Gather your supplies:
You will need nail polish in at least two shades that you wish to use for your ombre design, as well as a base coat and top coat. Also, you will need some sort of blending tools, such as a sponge or a nail art brush.
-
Prep your nails:
To ensure that your nails are protected and that the polish adheres to them, you should first apply a base coat. The base coat should be allowed to dry completely before moving on to the next step.
-
Apply the lighter shade:
Apply a thin layer of polish to the top half of your nails using the lighter shade. A nail art brush or a sponge can be used to blend the polish and create a gradient effect.
-
Apply the darker shade:
Apply the darker shade of polish to the lower half of your nails, again using a brush or sponge to blend the two shades.
-
Blend the shades:
Create the ombre effect by carefully blending the two shades in the middle of your nails with your blending tool.
-
Add a top coat:
If you are happy with the ombre design, you should finish off your nails with a top coat to seal in the polish and add a little shine to them.
-
Let your nails dry:
You should be patient and allow your ombre nails to dry completely before proceeding with anything else. It will ensure that your nail art remains in place and does not smudge.
Final Words:
Even though creating ombre nails can be time-consuming, the result is well worth the effort. An ombre manicure adds a unique and stylish touch to any outfit, and there are countless possibilities for creating different variations.
Consider using multiple shades for a more dramatic effect, or add glitter or decorative elements to your ombre nail design. Once you have practiced a few times, you will be able to create beautiful ombre nails at home in no time at all.
Variations of ombre nails:
The trend of ombre nails, or gradient nails, has gained popularity in recent years among nail art enthusiasts.
The ombre nail technique involves a gradual transition between light and dark shades, resulting in a visually pleasing and eye-catching appearance.
While the classic ombre look involves blending two shades, there are many variations you can try to add some variety to your nails. The following are some examples of different variations of ombre nails:
-
Gradient ombre:
Try blending three or more colors to create a gradient ombre effect instead of using just two shades. You can add a more dynamic and colorful touch to your ombre nail design by doing this.
-
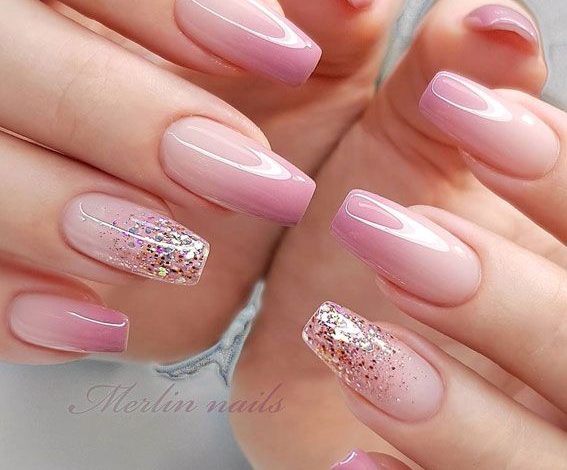
Glitter ombre:
Consider incorporating glitter into your ombre nails to add a touch of sparkle. To create a festive and glam look, you can add glitter polish or loose glitter to your ombre design.
-
Reverse ombre:
Try starting with a dark shade and gradually lightening up towards the tips rather than starting with a light shade and transitioning to a dark shade. The resulting reverse ombre effect is eye-catching and unique.
-
Two-tone ombre:
Use a solid color on the top half of your nails and a contrasting color on the bottom half to create a two-tone ombre effect. The result is a clean and modern ombre effect.
-
Ombre with patterns or shapes:
Consider incorporating patterns or shapes into your ombre nail design for a more elaborate look. If you wish to embellish your ombre design with details such as polka dots, stripes, or flowers, you can use a stencil or a nail art brush.
Conclusion:
To conclude, ombre nails are an attractive and versatile option for individuals seeking to add some flair to their nail art.
There are endless possibilities for creating unique and eye-catching ombre nail designs, regardless of whether you prefer a subtle gradient or a bold and dramatic look.
Using the right techniques and a little bit of practice, you can easily achieve beautiful ombre nails at home.